Your Cart

Yellow Dry Patches in the Summer
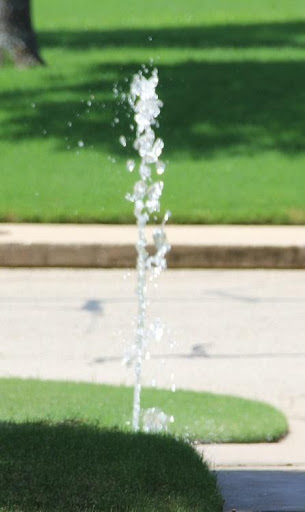
Do you have dry, yellow patches in your lawn like the ones in the photo below?
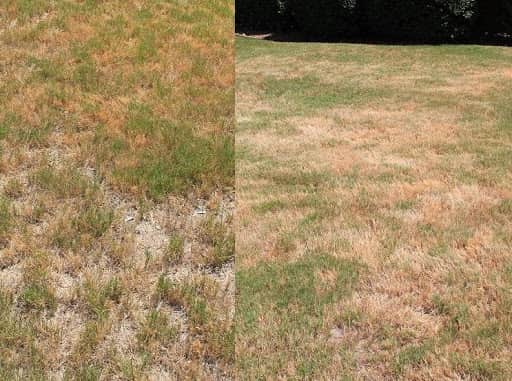
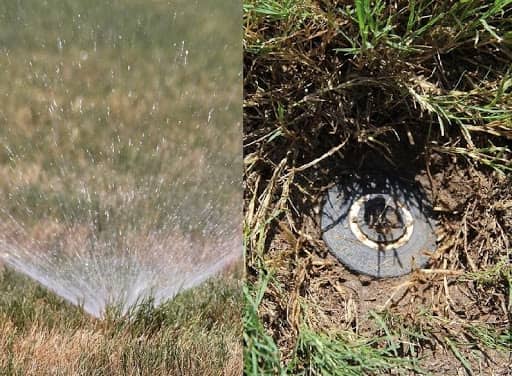
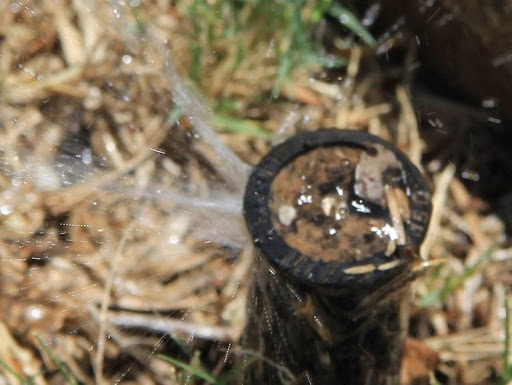
The problem will begin to appear about 2-3 weeks after the last measurable rainfall during the hot summer months since your lawn depends solely on your irrigation system to provide all the water for your lawn to remain green. The cause of this problem is the sprinkler system. Now before you say, “There’s nothing wrong with my sprinkler system.” continue reading this article, analyze your system with the information presented in it and then see if that is still your assessment. Sprinkler systems are not maintenance free, in fact, they require frequent attention every year, and the person who installed/repaired the system in the past may not have performed it to standards. The most common problem is with heads sinking into the ground over time causing the pop-up section (riser) to no longer rise above the lawn, which is critical for proper water distribution. When the sprinkler is off, the top of the head should be even with the top of the soil, this ensures the pop-up will rise above the height of the grass. The pictures below show 2 pop-up heads – the left picture is what a problem head looks like when the water is on; the picture on the right is when the system is off showing the top of a head sunken into the ground.
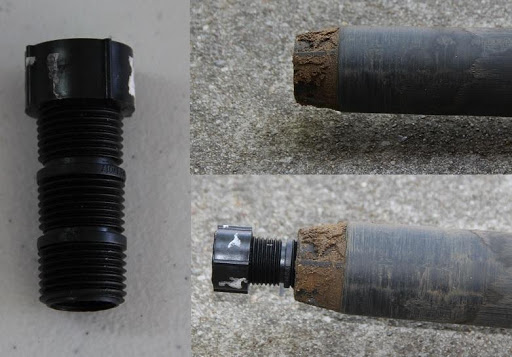
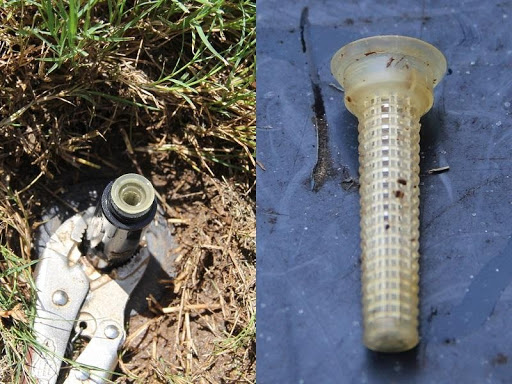
The solution is to install an extension fitting that connects the sprinkler head to the water line in the ground using a simple part that can be found at your local home improvement store. The picture below shows an extension, and the extension attached to bottom of the removed sprinkler head. Sections of the extension can be cut off for situations when the head only needs to be raised a small amount (bottom right picture below has one section cut off).
The video below comes from a company that sells a great tool for removing and replacing the sprinkler head, which makes this task much easier than digging up the head and cheaper than hiring a sprinkler repair company to correct these issues. Although this tool is not required, it simply makes this task much simpler. WATCH THIS VIDEO video: https://www.youtube.com/watch?v=4EsddHrrSqc
The picture below shows what the head now looks like reinstalled in its position along with how the riser now reaches above the lawn to spray unobstructed.
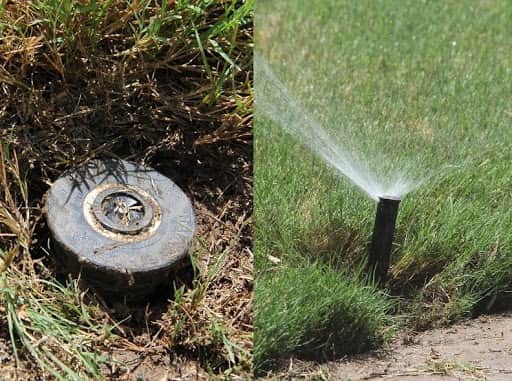 The pop-up should be perpendicular to the lawn it is irrigating. If the ground is sloped, the head should be adjusted to compensate. The right side of the picture above illustrates a head that is not quite perpendicular to the ground it is irrigating. Remove the dirt from around the head (4-6” deep) to be able to adjust the head, replacing the dirt to support it in the correct position.
While the head is applying water, check that no water is leaking around the base of the head. If the head is leaking water, install a new head – ensuring the nozzle spray pattern and distance are the same as the one being replaced. The nozzle in the picture below is a 180-degree, as indicated by the hashes; and a 15’ spray length as indicated by the number at the bottom of the nozzle. 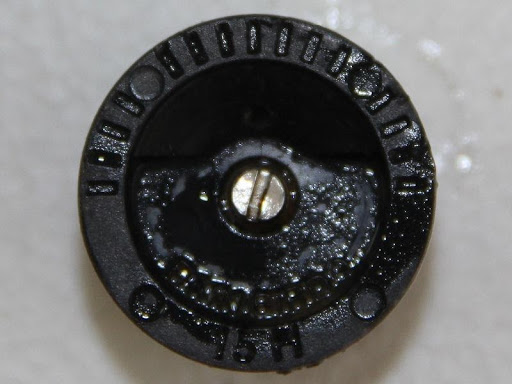
The next steps are fixed spray heads, rotary heads are covered later.
The spray nozzle at the top of the head must spray a consistent pattern with no disruptions. The picture below shows a nozzle that has a problem with a consistent spray pattern.
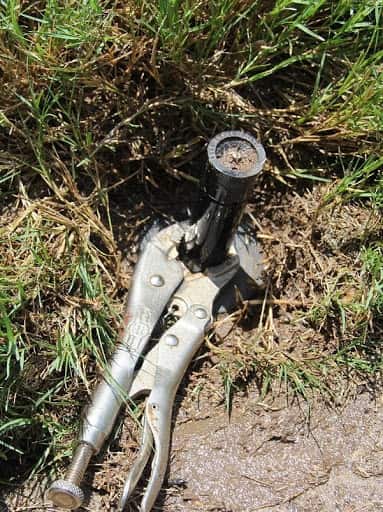
With the system switched off and using vise grip pliers, pull up on the pop-up riser. While holding it up, use the vise grip pliers to gently pinch and hold the riser in the up position – do not use too much pressure or you will damage the riser, a little squeeze is all that is necessary to hold the riser in position.
Remove the nozzle by holding the riser and unscrewing the nozzle from the riser. After the nozzle has been removed, there is a plastic filter screen sitting in the top of the riser. Remove and clean the screen of all contamination, but at this point do not reinstall the nozzle and screen or remove the vise grip pliers.
Operate this specific zone for about 20 seconds. Water will shoot out the opening of the riser since the nozzle is removed. This will purge any dirt out of the line – dirt in the line is an enemy to a sprinkler system!
Reinstall the filter screen and nozzle and remove the vise grip pliers. Operate the system again. If the nozzle still does not spray a consistent pattern, replace the nozzle with the same pattern and spray distance as indicated at the top of the current nozzle.
Rotary Heads: There are numerous types of rotary heads and how to adjust them varies by manufacturer, but the concepts are the same. To find out how to adjust your specific head, search the internet using the manufacturer name and model of the head. Points of reference when adjusting rotary heads is always from behind the head, except for 360-degree heads.
Ensure the head stops at the correct position when it comes fully back to the counter clockwise position (left). Typically, the only way to adjust this position is by turning the entire head assembly in the ground.
Adjust the clockwise stop position (right). This is where you will need to know how the manufacturer designed the head to be adjusted, it is typically done by the adjustment screw opposite of the spray nozzle. Decreasing the setting, decreases the travel in the counter clockwise direction. In the right side of the picture below, the bottom section has the forward and backward arrows – this is where the right position stop is adjusted.
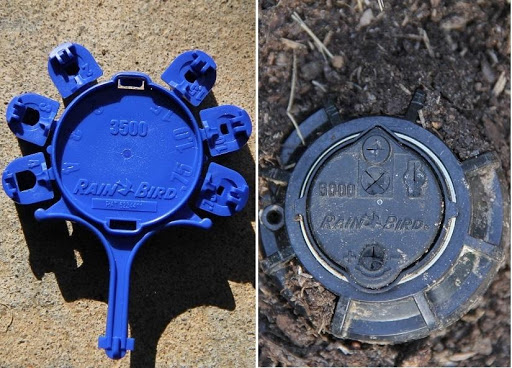 It is critical you determine you have the correct spray nozzle on every rotary head. Since rotary heads can spray in patterns from 90-degrees to 360-degrees, the nozzle installed must be changed to match the pattern. The basis is this: a 90-degree head typically has a 1.0 nozzle installed, a 180-degree head typically has a 2.0 nozzle and a 360-degree head typically has a 4.0 nozzle. The purpose for the correct nozzle is to ensure even distribution of water in the area being irrigated. Sometimes these nozzles might be 0.75, 1.5, & 3.0.
If you have a 1.0 nozzle in all the rotary heads, and some heads are 90s, some 180s and some 360s, there will be an unbalanced amount of water applied to the lawn. A 360-degree head is only applying water to an area 25% the amount of time that a 90-degree head is applying water; therefore, the 360-degree head’s nozzle must apply 4 times the amount of water as the 90-degree head. Once you know the manufacturer and model of your rotary head, replacement nozzles can be purchased and easily installed to correct any unbalances. The previous picture on the left side are the various nozzles for a specific Rain Bird rotary head. The larger the number, the larger the orifice is to allow more water to flow.
Adjust the length of the spray pattern coming from the head. While each manufacturer may require a specific tool to make this adjustment, the adjustment is usually always immediately behind or above the spray nozzle, at the top of the head.
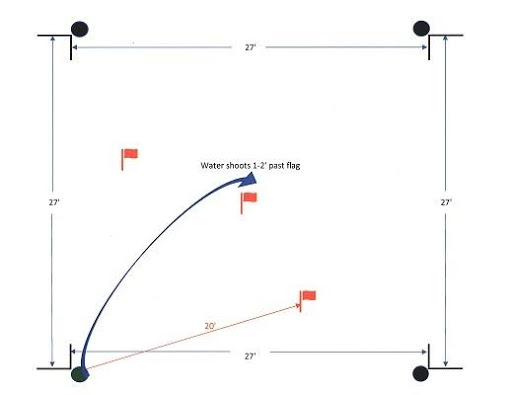
Measure the distance between the head being adjusted and the closest rotary heads to it.
Divide this distance by 3 and multiply by 2.2 (round up to next whole foot).
Place 3-4 flags at this distance from the head being adjusted at various sections inside the pattern of the head.
Adjust the spray nozzle screw until the spray pattern is shooting 1-2’ past each flag in the pattern.
Sometimes, you may find a rotary head in the same zone as a typical pop-up fixed head – this is a major “party foul” (i.e., not allowed)! The precipitation rate for a typical pop-up head is 3 times greater than a rotary head, which means that either the rotary head areas will receive too little water, or the pop-up head area will be over-watered, depending upon the programmed run time for that zone. Every head in the same zone must be a rotary head or a pop-up fixed spray head, combinations of both will only cause problems.
After you have repaired and properly aligned the sprinkler heads in the lawn, ensure that your control unit is properly programed per our recommendations. How you apply the water from your sprinkler system is key to a great looking lawn! To properly program your system, CLICK HERE.